Montag, 21. November 2011
Mittwoch, 26. Oktober 2011
When PXE saves the day...
It was so shocking last night when one of our filers crashed. It would have not so terrible if the mainboard is , say, normal. This system is my self built NAS-station, having 6 SATA ports. Yes, it is not normal, since all the ports are used by the harddisk, and I used "internal" USB slot to boot. I had no choice. The weird thing is that no IDE connector exist, but the old-useless-ugly-space-wasting-floppy-disk-connector is there! I never understand brain damaged companies that keep retaining this connector. To my opinion IDE is much more useful like for plugging a flash-disk.
The headache is, no direct access to the server room, no available replacement of the USB stick, and no port to plug a harddisk. It was time to think of a strategy. The only hope is network boot, pxe, as the boot server is alway running in the head. Thank to IPMI, I could just do everything remote although the speed is somehow irritating. Well the strategy is, boot to network, use ramdisk (tmpfs). This should be easy, I thought.
I worked on automating node installation using pxe, tftp, http, etc, a couple of years ago. So I dig again a bunch of scripts I wrote. It functioned, and it should still function this time. This is actually a brilliant idea of mine, if I'm allowed to say so, that to an unregistered node or any alien computer is given an installation boot scheme. One need only to create pxe boot configuration named before the mac address of the ip given by the dhcp server in hexadecimal form. Deleting the file would send a node to the default configuration, which is the installation. This default scheme is created by modifying initrd to allow loading installation script from the http server on the head. It's quite efficient and practical, since a user may change the script according to his need, not only for installation purpose. I called this a respond script, because it is used as a respond to the request sent by a booting node. The node send information of it's configuration (minimalist) such as mac addresses, information about hardisks in the request which is named by the first mac address.
The respond script will be executed by the node. To install a node it may have a straight forward step.
- Format hardisk
- Create disk image, maybe using debootstrap, etc.
- Load harddisk content from the server and put it in the harddisk. I used wget to take a targz-ed disk image. Quite efficent.
- Make a correct PXE boot configuration and let the node reboot.
Then It came to my mind, it should be easier just to put the disk image inside the initrd. Yes, the size explodes but who cares. One needs only about 250MB unzipped space for NAS. I modified initrd so it mount a tmpfs as root, and untargzs the attached disk image there. Now, actually I did not need the scheme I told you before, but I don't feel guilty telling you that because this idea came after meshing around with it. So I need only two files, the kernel and the fat initrd.
In init script inside initrd file, there are two options to load root file system, local and nfs. I could have added new options, say ramdisk, but I decided to do it in a rude way: force the system to use ramdisk.
A simple inclusion in scripts directory, called 'ramdisk' is sufficient:
# ramdisk
mountroot ()
{
wait_for_udev 10
mount -t tmpfs none ${rootmnt} -o size=2048M
tar xzvf /disk.tgz -C ${rootmnt}
rm /disk.tgz
}
- debian squeeze is used.
- unpacking initrd: gzip -dc path/to/initrd-file|cpio -id
- repacking initrd: find .|cpio -H newc -o|gzip > ../initrd-ramdisk , from the unpacked directory.
- Services on server:
- dhcp/bootp
- Required packages for NAS:
- mdadm
- lvm2
- rsync
- ssh
- modification needed in the disk image:
- /etc/fstab
- /etc//udev/rules.d/70-persistent-net.rules
- /etc/exports
- cleaning of unnecessary file under /usr and /var
Mittwoch, 7. September 2011
Using ipmitool @SuperMicro server
It' about time using IPMI instead of KVM-switch. In fact this capability is all the time there in our servers. Don't ask why I did not do this from the beginning.
Anyway, this is how to redirect console output to serial over lan (SOL), and controlling power via IPMI.
In fact a SuperMicro server has already embedded IPMI in the mainboard, which is accessible using http connection (Luckily its true for me). It has as well a KVM over ip facility, using java's iKVM. But, this java dependency is not so "flexible" for my need, regarding the fact that java plugin does not (currently) always work (particularly in x64). I think console application is still the perfect tool. So, I put my eyes to impiconsole and ipmitool.
Before using remote management, first you have to do some BIOS settings. This figures explain those settings, quite clearly:
Notice that COM3 must be used to make SOL works properly.
After all the settings are correct, you may direct a browser to the specified ip address, and the server can be fully controlled using browser. Console redirection will work if java plugin is configured correctly (under "Remote Control" menu).
Ipmitool is used for controlling/managing the server. It has a complete set of instructions. In fact, only "power on" and "power off" command are the most useful ones. Example:
ipmitool -H 192.168.0.100 -U ADMIN -P ADMIN power on
to power on the unit. ADMIN and ADMIN is the default user name and password.
To enable access using SOL, the following configuration must be done:
1. @/boot/grub/grub.cfg add this:
serial --unit=2 --speed=115200 --word=8 --parity=no --stop=1
terminal --timeout=10 serial console
and add "serial console=ttyS2,115200n8" to the "linux" line.
Don't use splash!
(Yes, grub2 configuration file looks a bit weird...)
2. @/etc/inittab add this:
s0:2345:respawn:/sbin/agetty ttyS2 115200
3. Make sure that ttyS2 is listed in /etc/securetty
Thats it. Now call:
ipmiconsole -h 192.168.0.100 -u ADMIN -p ADMIN
and boot the server. This is more or less the console output from the server:
For installation purpose, ipmiconsole is good if the installation media is able to redirect its output to the serial port. If not, the iKVM konsole (http access) is better, since it does not need any COM port at all.
This ipmitool command has the same function as ipmiconsole:
ipmitool -I lanplus -H 192.168.0.100 -U ADMIN -P ADMIN sol activate
See manual page of ipmitool and ipmiconsole for more complete reference.
One good thing from this server that IPMI may use a network wire together with the first interface (eth0), so I can use one less cable. Indeed, a separate RJ45 connector is also provided. In the client side I used multiple address in one of interfaces. Embarrassingly, I found it out recently that this is so easy to configure in Linux.
Say, in the admin computer (actually the main server) you have eth0 as your main interface, and is connected to the real ip address in the network. Since the network cable in the server (node) is used together by IPMI and the main interface, both are plugged into the same hub connection. Normally we need two interfaces plugged to the same hub at admin side. Uneconomical indeed.
The better way is using multiple address for a single interface. After bringing eth0 up, bring another interface, eth0:0, as example:
ifconfig eth0:0 192.168.0.1 netmask 255.255.0.0
In debian system, one can put in /etc/network/interfaces:
auto eth0:0
iface eth0:0 inet static
address 192.168.0.1
netmask 255.255.0.0
Now the first interface can be used both to access the internet with its original address (eth0) and also for connecting IPMI devices in 192.168.0.0 network.
For mac user, multiple address in a single interface can be easily configured in "Network Preferences".
Freitag, 28. November 2008
Imperfect notebook
In fact this notebook is not bad at all. I bought it couple of weeks ago for my sons birthday present: a tiny acer notebook with Intel Atom in it. From the size, it fits well to children's fingers. It is imperfect in the sense that, I made a wrong choice. I took SSD 8Gb version with only 512M memory. Well, I thought it was OK for children. From the hardware point of view I have no objections. I thought I could just put more memory later, and a harddisk as well.
I'm not going to tell the full story about my impression, its boring anyway. Someone can just put "acer one" in google search-bar, then he will be dropped to a bunch of articles about that. I think this notebook is getting more popular now. The interesting thing here is how I struggled with the operating system, since it came with a very ugly Linux settings. I would say terrible.
Firstly, I decided _not_ to change the OS (Linpus), since it might be using a special drivers, or whatever. Then I tried to restore it to the usable Linux form. I found: strange xorg configuration, no runlevel, stupid functionality to restore the users own settings, silly graphical user interface. It is also hard-wired to xfce window manager. If you want to use another lighter window manager, forget it! I made a brute change to its configurations. I deleted files which Acer provided (hacked?), for instance xfce-desktop2.
I'm not going to tell this "restoring" work either, cause it turns out that this wont work. Well it does work, but very ugly since you will not find Linux system like you expected. I was starting to think, that those guys who put this OS, wanted to make bad impression of Linux, or to show that it is not, at all, the better OS than Windows. The perfect example is when you delete some package using yum (Linpus comes from fedora), may be you will stuck to the black screen without being able to login, since xfce is responsible for everything. This system calls the init-scripts directly from xfce's autostart function.
The notebook was running for a couple of weeks with the "rehack" OS. I put the additional memory in it as well. Since I got many complains from my son, I started to realize that what I did was stupid. You can not expect good functionality from an ugly base. So I decided to switch to a "real" operating system. I Installed Debian in it following this wiki. The installing took hours, since the debian install cd image I used has a bug. Don't check the laptop option in the package selection menu! Everything worked perfectly afterward and it seems that all the hardware were detected well. Yes I said everything.
One thing to consider is to avoid using swap space. May be suspend of hibernate will not function, but I don't care. The last thing and maybe the most important thing I did is moving all the actively used directories to the ram space using ramdisk (tmpfs). This is very easy. What we have to do is the followings:
1) use this as /etc/fstab
2) and make a small script to provide some missing directories as /etc/init.d/prepare-var.sh. Call this script on boot time. What I did is creating a link under rc2.d directory.
Samstag, 3. Mai 2008
GlusterFS: The end of (our) NFS?
In fact this is not the first GlusterFS installation in our cluster. /G has installed it a couple times ago, but It was not used. Now I have to reactivate it and rearrange the settings in the better way. Now I am forced to do it, just because the P5 system is not responding up to now.
The situation is, we have nodes with rather big storages each. These storages were not used optimally before. GlusterFS seems to be ideal, since it can gather all the free spaces for all nodes. I configured the harddisks using LVM last time, so the file system size spans in two storages. The total capacity is now 265 per node. Actually we can have around 3.5Gigs, but I decided to make it redundant.
Preparing GlusterFS
GlusterFS can be downloaded from this link. We used version 1.3.7. This file system uses FUSE to be mounted on client. So FUSE must also be installed prior to GlusterFS. The patched version can be found here.
Do a normal installation, configure, make and make install to those downloaded source codes. Please refer to their installation instruction. Try to solve all dependencies. If you still have trouble and have no idea to install them, maybe you need to find another job :D.
Configuring GlusterFS
I have, in front my eyes, 14 nodes to configure. The first node is used as the head node. So it is excluded from the main storage brick. Instead its free space is combined with node-12 for a scratch space. The nodes are enumerated from 00 to 12, so when redundant storage is preferred, only node-00 to node-11 can be used.
All nodes, except node-12, share their space in the same way. node-00 and node01 are selected as the head storage. A head node has a special shared space, called the name-space. So basically these two nodes are the same with others. all nodes mount the shared partition below /gls directory. The fstab entry is as follow:
The volume configurations are stored inside the directory /etc/glusterfs. Followings are the content of these files:
1) server with name-space (node-00 & node-01), gfs-server-ns.vol
2) server without name-space (node-02 to node-11), gfs-server.vol
3) scratch server (node-head & node-12), gfs-server-scr.vol
I set the allowed address here explicitly, because head node is world accessible. I would think to do the same for others, but maybe later. Those are the required configuration files for brick/block servers. The followings are the client configuration files.
1) main working space, gfs-client.vol
2) scratch space, scratch.vol
Scratch space uses no redundant blocks.
After all the configuration files are prepared, the files are copied to the nodes. I used rgang to do the copy. I prepared first files below /etc/clusternodes for rgang, according to the definitions mentioned above: glshead, glsserv, glsscr, and world.
Now we need the script to activate them. I wrote the following script, and put it below /etc/init.d. All the nodes have the same script, glus-load.
Now since everything is ready, we only need rgang again to activate them.
I would suggest to activate the new filesystem only from the head node, after checking the availability of all required node. This can take place in rc.local. Of course in Debian system.
I read also that someone has provided a Debian repository for GlusterFS. So things will became less complicated.
So this looks like the end of our _imperfect_ NFS server. Unless if I can fix our AIX station. To be honest, I don't like AIX. Its only expensive. I am thinking of installing Linux in it, maybe, share the filesystem also with GlusterFS?
Now look what we have after mounting the new filesystem,
/dev/scratch-vol/scr /gls ext3 defaults 0 0
$ rgang world /etc/init.d/glus-load start
Donnerstag, 1. Mai 2008
Changing layout
I changed the layout of this blog. Now everything looks like a mess! Man, I don't care.
Dienstag, 29. April 2008
Moving the cluster
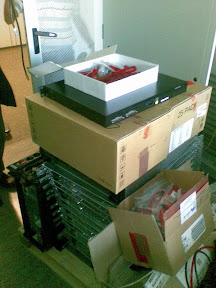
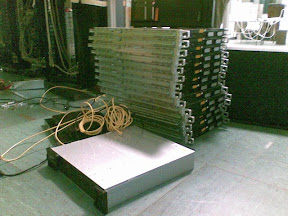
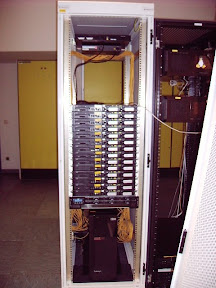
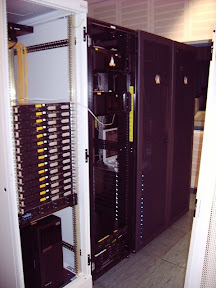
Last Thursday I moved the cluster to computer center room. Of course with the help of my two nice friends, Gerolf and Christian. Reasons: our previous server room is too small and the cluster became too hot. That server room turned out as a sauna room :D. It was reasonable why the cluster became hot. The usage was increasing very highly. Almost all the time 100% of processors are used.
 Look at the mess we have created!
 Everybody on the floor!!
 Putting them together
 Standing side by side with our 'nigol' cluster


