Freitag, 28. November 2008

Imperfect notebook

In fact this notebook is not bad at all. I bought it couple of weeks ago for my sons birthday present: a tiny acer notebook with Intel Atom in it. From the size, it fits well to children's fingers. It is imperfect in the sense that, I made a wrong choice. I took SSD 8Gb version with only 512M memory. Well, I thought it was OK for children. From the hardware point of view I have no objections. I thought I could just put more memory later, and a harddisk as well.

I'm not going to tell the full story about my impression, its boring anyway. Someone can just put "acer one" in google search-bar, then he will be dropped to a bunch of articles about that. I think this notebook is getting more popular now. The interesting thing here is how I struggled with the operating system, since it came with a very ugly Linux settings. I would say terrible.

Firstly, I decided _not_ to change the OS (Linpus), since it might be using a special drivers, or whatever. Then I tried to restore it to the usable Linux form. I found: strange xorg configuration, no runlevel, stupid functionality to restore the users own settings, silly graphical user interface. It is also hard-wired to xfce window manager. If you want to use another lighter window manager, forget it! I made a brute change to its configurations. I deleted files which Acer provided (hacked?), for instance xfce-desktop2.

I'm not going to tell this "restoring" work either, cause it turns out that this wont work. Well it does work, but very ugly since you will not find Linux system like you expected. I was starting to think, that those guys who put this OS, wanted to make bad impression of Linux, or to show that it is not, at all, the better OS than Windows. The perfect example is when you delete some package using yum (Linpus comes from fedora), may be you will stuck to the black screen without being able to login, since xfce is responsible for everything. This system calls the init-scripts directly from xfce's autostart function.

The notebook was running for a couple of weeks with the "rehack" OS. I put the additional memory in it as well. Since I got many complains from my son, I started to realize that what I did was stupid. You can not expect good functionality from an ugly base. So I decided to switch to a "real" operating system. I Installed Debian in it following this wiki. The installing took hours, since the debian install cd image I used has a bug. Don't check the laptop option in the package selection menu! Everything worked perfectly afterward and it seems that all the hardware were detected well. Yes I said everything.

One thing to consider is to avoid using swap space. May be suspend of hibernate will not function, but I don't care. The last thing and maybe the most important thing I did is moving all the actively used directories to the ram space using ramdisk (tmpfs). This is very easy. What we have to do is the followings:

1) use this as /etc/fstab

proc /proc proc defaults 0 0 /dev/sda1 / ext2 defaults,noatime,nodiratime,errors=remount-ro 0 1 none /var/log tmpfs defaults,size=16M 0 0 none /tmp tmpfs defaults,size=128M 0 0 none /var/tmp tmpfs defaults,size=32M 0 0 /dev/mmcblk0p1 /media/home ext2 defaults,noatime,nodiratime 0 0

2) and make a small script to provide some missing directories as /etc/init.d/prepare-var.sh. Call this script on boot time. What I did is creating a link under rc2.d directory.
#!/bin/bash #### # Acer Aspire One: # some directory @ var are moved to tmpfs # prepare directory below /var # do_start() { /bin/mkdir -p /var/log/apt /bin/mkdir -p /var/log/gdm /bin/touch /var/log/dmesg } case "$1" in start|"") do_start ;; restart|reload|force-reload) echo "Error: argument '$1' not supported" >&2 exit 3 ;; stop) # No-op ;; *) echo "Usage: prepare-var.sh [start|stop]" >&2 exit 3 ;; esac
This makes the tiny notebook much faster and also saves the life time of the SSD. The best imperfect thing is, now it is a normal usable computer. This trick is also useful in other system that uses Compact Flash as its boot device. I did also the similar thing to my shuttle pc. I put 4GB CF-disk in it and use it as the boot device. It starts speeding!!

Samstag, 3. Mai 2008

GlusterFS: The end of (our) NFS?

In fact this is not the first GlusterFS installation in our cluster. /G has installed it a couple times ago, but It was not used. Now I have to reactivate it and rearrange the settings in the better way. Now I am forced to do it, just because the P5 system is not responding up to now.

The situation is, we have nodes with rather big storages each. These storages were not used optimally before. GlusterFS seems to be ideal, since it can gather all the free spaces for all nodes. I configured the harddisks using LVM last time, so the file system size spans in two storages. The total capacity is now 265 per node. Actually we can have around 3.5Gigs, but I decided to make it redundant.

Preparing GlusterFS

GlusterFS can be downloaded from this link. We used version 1.3.7. This file system uses FUSE to be mounted on client. So FUSE must also be installed prior to GlusterFS. The patched version can be found here.

Do a normal installation, configure, make and make install to those downloaded source codes. Please refer to their installation instruction. Try to solve all dependencies. If you still have trouble and have no idea to install them, maybe you need to find another job :D.

Configuring GlusterFS

I have, in front my eyes, 14 nodes to configure. The first node is used as the head node. So it is excluded from the main storage brick. Instead its free space is combined with node-12 for a scratch space. The nodes are enumerated from 00 to 12, so when redundant storage is preferred, only node-00 to node-11 can be used.

All nodes, except node-12, share their space in the same way. node-00 and node01 are selected as the head storage. A head node has a special shared space, called the name-space. So basically these two nodes are the same with others. all nodes mount the shared partition below /gls directory. The fstab entry is as follow:

/dev/scratch-vol/scr /gls ext3 defaults 0 0

The volume configurations are stored inside the directory /etc/glusterfs. Followings are the content of these files:

1) server with name-space (node-00 & node-01), gfs-server-ns.vol

volume wapblock type storage/posix option directory /gls/block end-volume volume wapblock-ns type storage/posix option directory /gls/block-ns end-volume volume server type protocol/server option transport-type tcp/server subvolumes wapblock wapblock-ns option auth.ip.wapblock.allow * option auth.ip.wapblock-ns.allow * end-volume

2) server without name-space (node-02 to node-11), gfs-server.vol

volume wapblock type storage/posix option directory /gls/block end-volume volume server type protocol/server option transport-type tcp/server subvolumes wapblock option auth.ip.wapblock.allow * end-volume

3) scratch server (node-head & node-12), gfs-server-scr.vol

volume wapblock type storage/posix option directory /gls/block end-volume volume wapblock-ns type storage/posix option directory /gls/block-ns end-volume volume server type protocol/server option transport-type tcp/server subvolumes wapblock wapblock-ns option auth.ip.wapblock.allow 192.168.100.* option auth.ip.wapblock-ns.allow 192.168.100.* end-volume

I set the allowed address here explicitly, because head node is world accessible. I would think to do the same for others, but maybe later. Those are the required configuration files for brick/block servers. The followings are the client configuration files.

1) main working space, gfs-client.vol

volume gls-node00 type protocol/client option transport-type tcp/client option remote-host node-00 option remote-subvolume wapblock end-volume #..... the same code blocks take place here, except the volume name and remote-host name #..... for node-01 to node-11 # now namespaces. Two of them are needed. volume gls-node00-ns type protocol/client option transport-type tcp/client option remote-host node-00 option remote-subvolume wapblock-ns end-volume volume gls-node01-ns type protocol/client option transport-type tcp/client option remote-host node-01 option remote-subvolume wapblock-ns end-volume # Automatic file replication volume mirror01 type cluster/afr option replicate *:2 subvolumes gls-node00 gls-node01 end-volume # the same code blocks continue. # Pairing: gls-node02 - gls-node03 .... until gls-node10 - gls-node11 # namespace mirror volume mirror-ns type cluster/afr subvolumes gls-node00-ns gls-node01-ns end-volume # combine all volume unify type cluster/unify option namespace mirror-ns option scheduler rr option rr.limits.min-free-disk 5% option rr.refresh-interval 10 subvolumes mirror01 mirror02 mirror03 mirror04 mirror05 mirror06 end-volume # performance volume readahead type performance/read-ahead option page-size 256 # 256KB is the default option option page-count 4 # 2 is default option option force-atime-update off # default is off subvolumes unify end-volume volume writebehind type performance/write-behind option aggregate-size 1MB # default is 0bytes option flush-behind on # default is 'off' subvolumes unify end-volume

2) scratch space, scratch.vol

Scratch space uses no redundant blocks.

volume scr-node1 type protocol/client option transport-type tcp/client option remote-host node-head option remote-subvolume wapblock end-volume volume scr-node2 type protocol/client option transport-type tcp/client option remote-host node-12 option remote-subvolume wapblock end-volume volume scr-ns type protocol/client option transport-type tcp/client option remote-host node-head option remote-subvolume wapblock-ns end-volume volume unify type cluster/unify option scheduler rr option namespace scr-ns subvolumes scr-node1 scr-node2 end-volume

After all the configuration files are prepared, the files are copied to the nodes. I used rgang to do the copy. I prepared first files below /etc/clusternodes for rgang, according to the definitions mentioned above: glshead, glsserv, glsscr, and world.

$ rgang -c glshead gfs-server-ns.vol /etc/glusterfs/gfs-server.vol $ rgang -c glsserv gfs-server.vol /etc/glusterfs/gfs-server.vol $ rgang -c glsscr gfs-server-scr.vol /etc/glusterfs/gfs-server.vol $ rgang -c world gfs-client.vol /etc/glusterfs $ rgang -c world scratch.vol /etc/glusterfs

Now we need the script to activate them. I wrote the following script, and put it below /etc/init.d. All the nodes have the same script, glus-load.

#!/bin/bash # Loading GlusterFS # Rosandi 2008 #loading glusterfs daemon @ server load-srv() { glusterfsd -f /etc/glusterfs/gfs-server.vol || echo failed >> /var/log/glus-srv.log } #mounting client load-cl() { echo "/usrshome" glusterfs -f /etc/glusterfs/gfs-client.vol /usershome echo "/scr" glusterfs -f /etc/glusterfs/scratch.vol /scr } unload-cl() { umount /usershome umount /scr } case "$1" in start) echo "Loading GlusterFS daemon: " load-srv sleep 5 echo "mounting GlusterFS: " load-cl ;; stop) unload-cl killall glusterfsd ;; restart) $0 stop $0 start ;; *) echo "Usage: glus-load {start|stop|restart}" exit 1 esac exit 0

Now since everything is ready, we only need rgang again to activate them.

$ rgang world /etc/init.d/glus-load start

I would suggest to activate the new filesystem only from the head node, after checking the availability of all required node. This can take place in rc.local. Of course in Debian system.

I read also that someone has provided a Debian repository for GlusterFS. So things will became less complicated.

So this looks like the end of our _imperfect_ NFS server. Unless if I can fix our AIX station. To be honest, I don't like AIX. Its only expensive. I am thinking of installing Linux in it, maybe, share the filesystem also with GlusterFS?

Now look what we have after mounting the new filesystem,

Filesystem Size Used Avail Use% Mounted on /dev/sda2 133G 6.8G 119G 6% / tmpfs 3.9G 0 3.9G 0% /lib/init/rw udev 10M 44K 10M 1% /dev tmpfs 3.9G 0 3.9G 0% /dev/shm /dev/sdb1 147G 188M 140G 1% /gls glusterfs 1.6T 1.1G 1.5T 1% /usershome glusterfs 411G 376M 390G 1% /scr

Donnerstag, 1. Mai 2008

Changing layout

I changed the layout of this blog. Now everything looks like a mess! Man, I don't care.

Dienstag, 29. April 2008

Moving the cluster

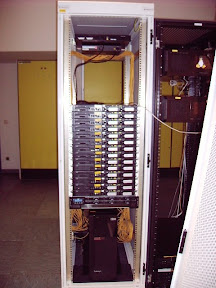
Last Thursday I moved the cluster to computer center room. Of course with the help of my two nice friends, Gerolf and Christian. Reasons: our previous server room is too small and the cluster became too hot. That server room turned out as a sauna room :D. It was reasonable why the cluster became hot. The usage was increasing very highly. Almost all the time 100% of processors are used.

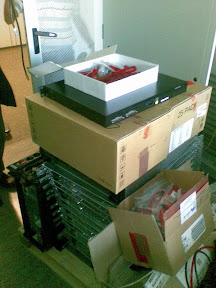
Look at the mess we have created!
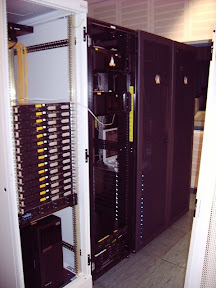
The server room is pretty large, since it stores almost all the servers of the university. I put the cluster in the corner, beside our new-larger-cluster.
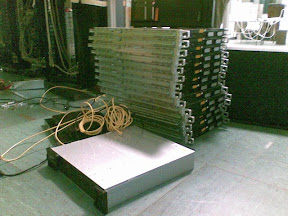
Everybody on the floor!!
This cluster is 10 times more difficult to assembly. The screws are not matched each other, the door is heavy, the rack is terribly terrible. But I made it! It is imperfect of course, but it is prefect in giving me some exercises. Now here it is, after assembling.
Putting them together
Of course beside our black cluster! Do you see those penguins?
Standing side by side with our 'nigol' cluster

Sonntag, 10. Februar 2008

New node plug and pray

Since our new cluster has just come. Partly. I want to make them automagically booting without further per-node configuration. We (me and Gerolf) have made the scenario like this: All nodes boot via pxe. For this we need to install a proper dchp, nfs, tftp, and linux-pxe. apt-get will help us. Notes: - do not use dhcp3, it fails to give pxe files. Dunno why. - use tftp-hpa The problem is, we don't know the addresses of interfaces of the nodes. The installation would be rather annoying, if we had to plug one-by-one a monitor to each node, just to see they hardware addresses. No. I don't want to do like that. This is the trick: Node side 1) steal initrd from Debian, and change its init script, just to detect network interfaces (eth*). 2) use tftp to stor the address at servers directory. Put it in the provided slots at the server. 3) wait until the server provide everything needed to boot, by waiting for an indicator. I chose as indicator a string 'ready' in the slot file. 4) reboot, and fetch the right kernel, initrd, and nfsroot. Server side 1) configure dhcpd to serve request from unknown interfaces. To do this I give a range declaration inside the subnet block for dynamic ips fron 10.255.0.1 to 10.255.0.255. 2) prepare request directory, containing slot files called req-(number). (number) is only sequence number to identify the slot. 3) check the slot files. If they contains hardware address then process it and put the corresponding entries in /etc/dhcpd.conf. 4) write indicator (ready string) inside each configured nodes. 5) call refresh script, written by Gerolf, to refresh pxe boot files, nfs exports, dhcp, and everything which is needed. Consult documentation about setting up pxe-boot somewhere in the net. If I put that details here, it would only give noises. If there is nothing wrong, the node will boot and getting online soon. This is the init script inside initrd,

----------------------------------------------------------- #!/bin/sh echo "Loading, please wait..." [ -d /dev ] || mkdir -m 0755 /dev [ -d /root ] || mkdir --mode=0700 /root [ -d /sys ] || mkdir /sys [ -d /proc ] || mkdir /proc [ -d /tmp ] || mkdir /tmp mkdir -p /var/lock mount -t sysfs none /sys mount -t proc none /proc tmpfs_size="10M" if [ -e /etc/udev/udev.conf ]; then . /etc/udev/udev.conf fi mount -t tmpfs -o size=$tmpfs_size,mode=0755 udev /dev [ -e /dev/console ] || mknod /dev/console c 5 1 [ -e /dev/null ] || mknod /dev/null c 1 3 > /dev/.initramfs-tools mkdir /dev/.initramfs export DPKG_ARCH= . /conf/arch.conf export ROOT= . /conf/initramfs.conf for i in conf/conf.d/*; do [ -f ${i} ] && . ${i} done . /scripts/functions export break= export init=/sbin/init export quiet=n export readonly=y export rootmnt=/root export debug= export cryptopts=${CRYPTOPTS} export ROOTDELAY= export panic= SERVER= DEV=eth0 for x in $(cat /proc/cmdline); do case $x in server=*) SERVER=${x#server=} ;; dev=*) DEV=${x#dev=} ;; break=*) break=${x#break=} ;; break) break=premount ;; esac done depmod -a maybe_break top run_scripts /scripts/init-top load_modules run_scripts /scripts/init-premount maybe_break request [ -z "$SERVER" ] && panic "Server name must be defined in \ kernel option: server=" echo "#### getting interface address of $DEV ####" ipconfig -c dhcp -d $DEV ping -c 2 $SERVER || panic "Cannot connect server $SERVER" ##### # request file in format req-(number) must exist and writable (mode 666) # in request directory @ server # req=1 reqfile="" while [ ${req} -le 100 ]; do tftp -g -l req -r request/req-${req} $SERVER if [ -s req ]; then req=$(( ${req} + 1 )) else reqfile=req-${req} break fi done [ -z "${reqfile}" ] && panic "No free request slot.. this is impossible" # slot available for i in /sys/class/net/eth*; do cat $i/address >> req done tftp -p -l req -r request/${reqfile} $SERVER ready= while [ -z "$ready" ]; do echo "<<<< waiting for valid boot files >>>>" sleep 10 tftp -g -l req -r request/${reqfile} $SERVER grep ready req && ready=yes done echo "<<<< Booting files are ready.... REBOOT... >>>>" reboot --------------------------------
And to handle the request, I put a _secret_ tag:
#--> insertion point bla bla bla

somewhere in a right place inside dhcpd.conf. All the host entry will be written in _one line_. I put also a lease range 10.255.0.1 to 10.255.0.255 in the subnet block. Here is the handling script,
---------------------------------- DIR=/srv/tftp die() { echo $@ exit } cd $DIR/request echo "searching request" rm -f /tmp/newnode handled= for i in req-*; do [[ -s $i ]] || continue grep 'ready' $i && continue mainif=`awk 'NR==1{print}' $i` auxif=$(awk 'NR==2{print}' $i ) pxef=$(echo $mainif|awk '{gsub(/:/,"-");print}') [[ -f ../pxelinux/$pxef ]] && continue echo "Handling request for $mainif" handled="$handled $i" # find node number awk 'BEGIN{n=0} /^[[:space:]]*#/{next} /^[[:space:]]*host node/{gsub(/[[:alpha:]_-]/,"",$2);if(n<$2)n=$2} END{print "host node"n+1" \ {option host-name \"node"n+1"\";\ hardware ethernet '$mainif';fixed-address 10.10.1."n+1";}" if("'$auxif'") print "host node"n+1"a \ {hardware ethernet '$auxif';fixed-address 10.10.2."n+1";}" }' /etc/dhcpd.conf >> /tmp/newnode done [[ -z $handled ]] && die "no new node request" awk 'BEGIN{fl=0} FNR==1{fl++} fl==1{x[FNR]=$0;next} /^#--> insertion/{for(i in x)print x[i]} {print}' /tmp/newnode /etc/dhcpd.conf > /tmp/dhcpd-tmp mv /tmp/dhcpd-tmp /etc/dhcpd.conf rm -f /tmp/newnode /root/admin-scripts/refresh # to reboot the node: put 'ready' in req-* file in request directory for i in $(echo $handled);do echo ready > $i; done ----------------------------------------------------------------------